Raku Mask

glazed raku mask
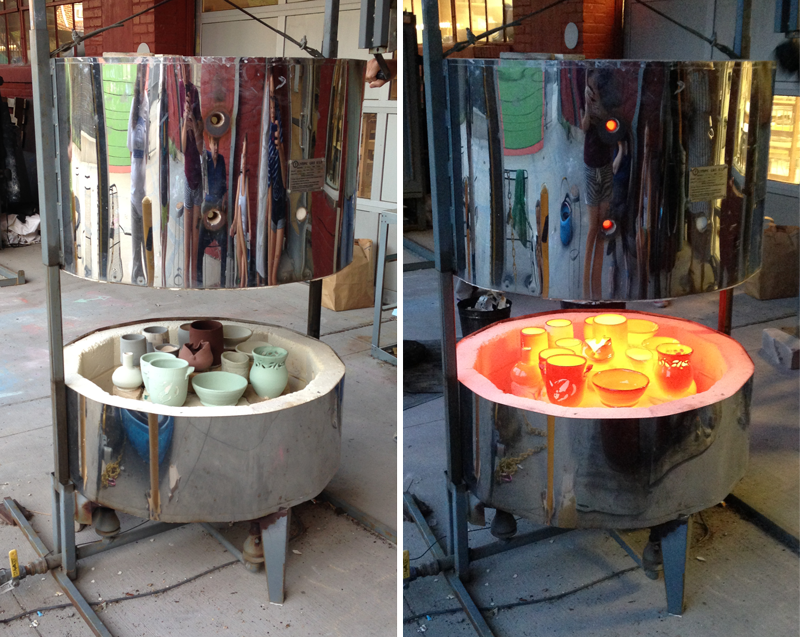
before and after raku firing

Raku on Fire

natalie raku mask-updated

Updated Raku Mask Detail
I posted a few months ago about the inspiration for this Raku mask project. Well, the final glaze is complete! We hadn't done a Raku firing at the Visual Art Center where I have been taking classes in a while, but we finally did last night. I threw a few other random pieces in, simply because I love the effect that the fire has on the clay.The mask turned out pretty great. I coated the face with the wax resist so that the glaze wouldn't effect the main part of the face, just like my old mask. You can see above how I dipped the whole mask in the glaze. The area in the middle remained wet and was able to be wiped away before putting it into the kiln.The entire experience of Raku is really fun. When you are done though, you end up smelling like a campfire. Above, the photo on the left shows all the pots that went into this firing. The green color you see on few is the same type of glaze I used to coat my mask. The pots glow brightly when they are fired. They turn a molten color and its just gorgeous to see.Once the kiln is opened, you prepare a bunch of metal bins and get ready to see some real flames. There is a pile of wood chips and shredded newspaper in each bin. Someone uses large tongs and begins dropping pieces into the containers. As soon as they catch on fire, a lid is placed on top to contain it and eventually burn it out. The results are always unique. The color of the glaze is different based on how it is it by the flames and how it cools. Once the fire has burned out, you simply rinse your smokey piece in cool water.My original mask had a lot more texture on the outsides, it wasn't as smooth or glossy. I also didn't coat enough with wax as some little flecks of glaze got into some of the details. Overall though, this project was a lot of fun and it cool to see two versions of the same face ten years apart.