the trailer: cabinet layout

After my last trailer visit, I sat down and started laying out what I wanted the cabinets to look like. I had a rough idea of my "dream layout" when I started this project, but knew it would have to adjust once the space was reconstructed.

I went to see the trailer and measured out the final size and location of the windows and walls with my friend. He sketched it out for me. I am thankful I didn't plan too far ahead because there were a few significant changes. For example, we "removed" a window, added in the fan, and put outlets where there were no outlets before.
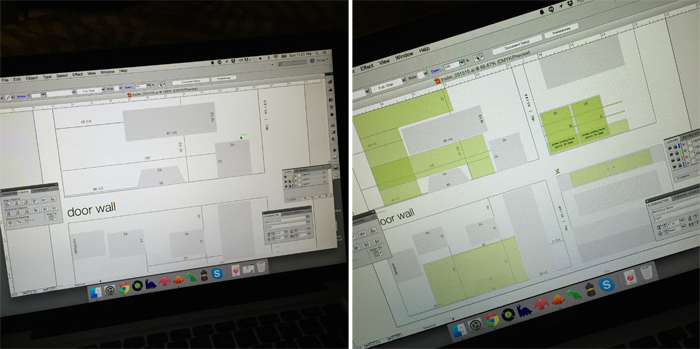
Once I had some basic measurements, I immediately went home and started working. I stayed up really late at night playing on my computer with ideas. I was texting friends the pictures below. I used illustrator to first lay out just the basic location of all the built in pieces that weren't moving.You can see each layer of my Illustrator file build below. The grey at the beginning are the built ins followed by their measurements. This was the easy part to draw since we had measured it earlier that night!
the trailer: cabinet layout | ilovenataliekay
Then I played for a long time with what I wanted my cabinets to look like. This is the green layer. I tried a bunch of options before settling down on the one you see create below. On one side of the trailer, I will have a long deep work bench where my letterpress will rest. The opposite side will have storage for different tools and equipment. The teal layer, that gets added last, shows some of the large items I had to account for in the space like my letterpress and screenprinting exposure unit & screens.
LAYERS: Built Ins | Built In Measurements | Dream Cabinet Layout | Cabinet Measurements | Large Items
If you click on the image above or here you can download the PDF to see it larger.