Glass Fusing & Slumping
One of the benefits of teaching at the Visual Art Center is the access to other studios and classes. I love trying different mediums because it gives me a vast appreciation for the craft that other’s have. So far, I have tried my hand at clay, weaving, digital photography and stained glass. This time, I opted to try glass fusing a slumping. No, I had no idea what I was getting into, nor did I even realize what the words MEANT when I first started taking this. But, my teacher, Jude was a wonderful instructor, and I came out of class with a variety of different pieces and knowledge.
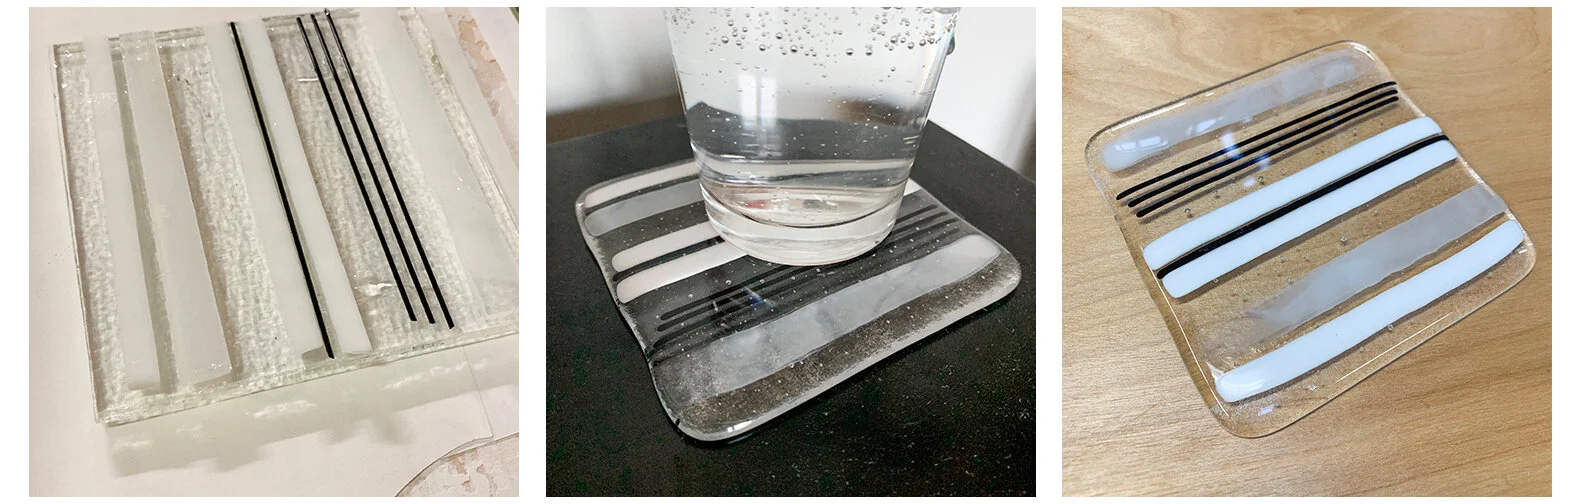
This is gonna be a long post, but hang tight (or just scroll to see all the photos!) The first night of class, we went over the basics of cutting glass (something I was familiar with from making stained glass). The first class we were told to make some coasters to better learn the fusing process.
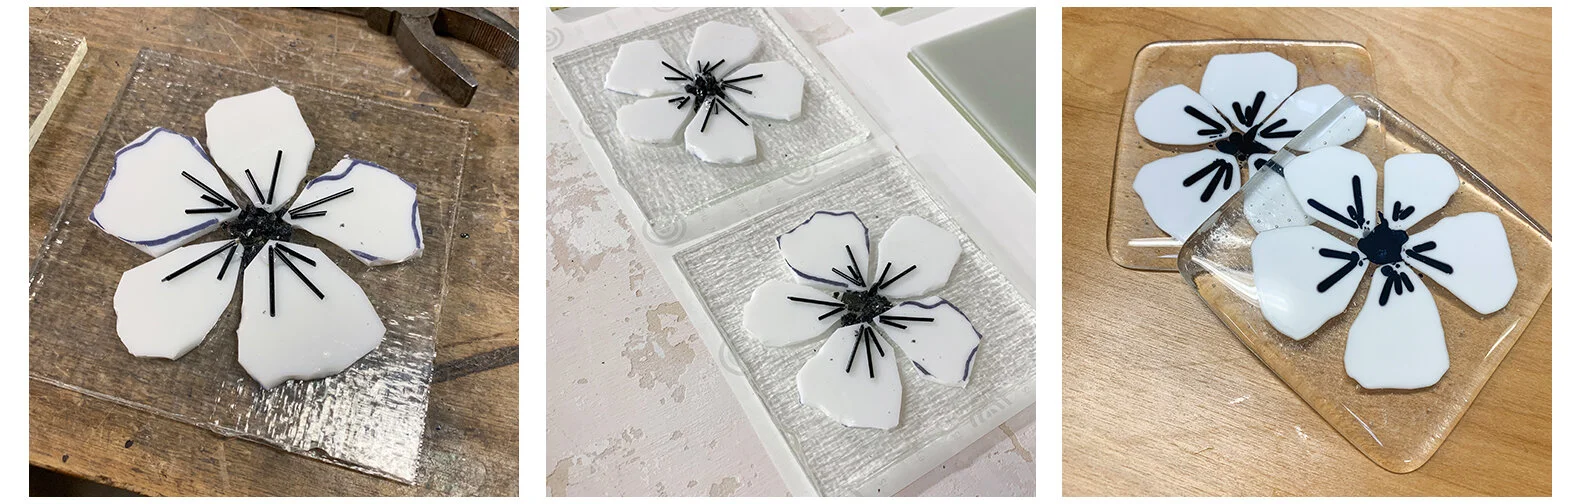
To fuse glass, you heat it up in a kiln to a very high temperature and each layer of glass melts into a final shape. I knew going into this class I was going to make a lot of black and white pieces I could use around my house, so the first projects were no exception. I started with some simple flowers and lines just to see how it would come together.
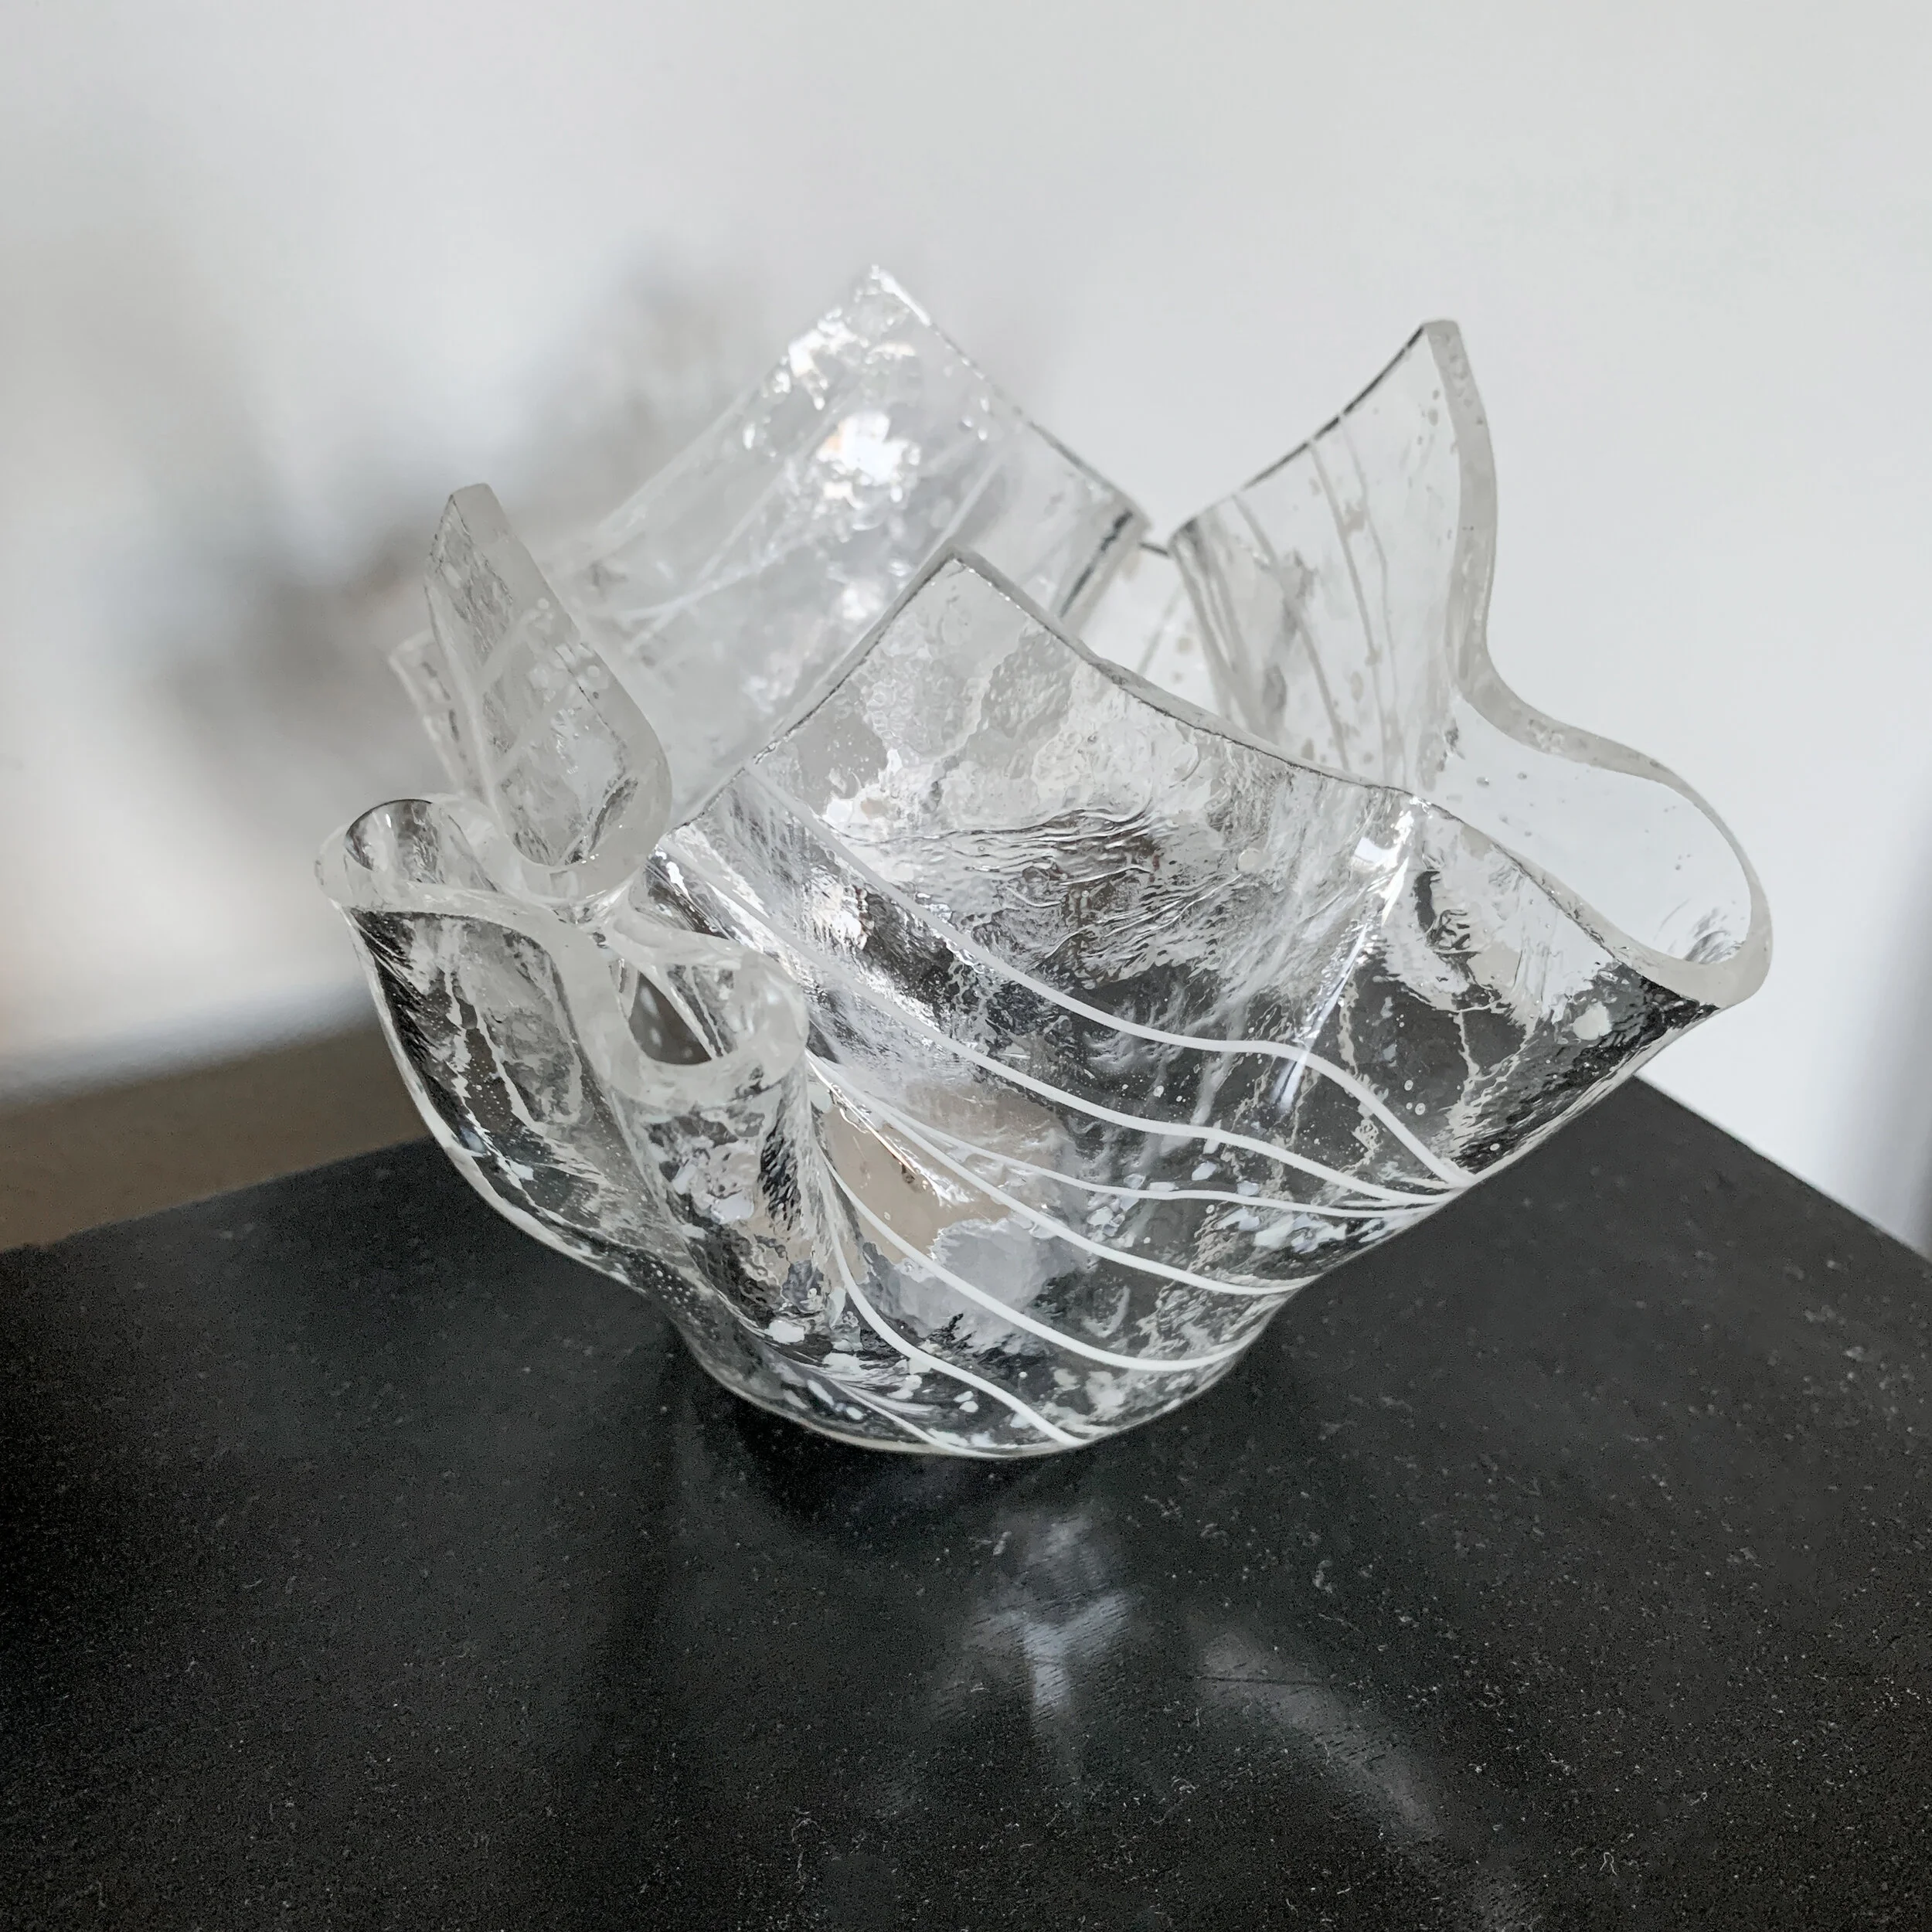
The second class we tried our hand at slumping. Slumping is when you melt the glass in a form so it holds the shape you placed it in. I made a small spoon rest (again, with scrap glass) using a square domed shape.

I also cut a simple square and slumped it over a tall cylinder. What happens once you melt it is a unique shape that is reminiscent of a tissue being pinched from one place. Once I tried my hand at a few small projects, I got to branch out more.
This little glass piece was inspired by art I saw in Canada and wedding invitations I designed for my brother. This was my first test with a process called partial fusing. With this, you heat the glass up in the kiln, but not enough to melt it fully together. What’s interesting is that the glass binds, but still retains some of it’s shape. To get the crackly textures, you smash glass into tiny bits and then stack it in the shape you want to create. I love how the lupines came out and plan on turning this into a night light.

After my first partial fuse came out well, I opted to test something a bit larger. I had this idea to make a glass envelope to store more envelopes in my studio. I did some math and planned on partially fusing the pieces together so it retained some of its envelope-like lines. I used a ceramic fiber paper on the inside of the glass (which is heat-resistant) so the envelope would hold it’s shape. Once it went into the kiln though, it exploded!

The ceramic paper, that stopped the glass from melting in the middle, retained too much heat and forced the glass apart. I didn’t let it get me down though and made another one (and a mini!). My second one also cracked (along the right side), but in a way that I could krazy glue it back together. This was one of the best things during the whole class.

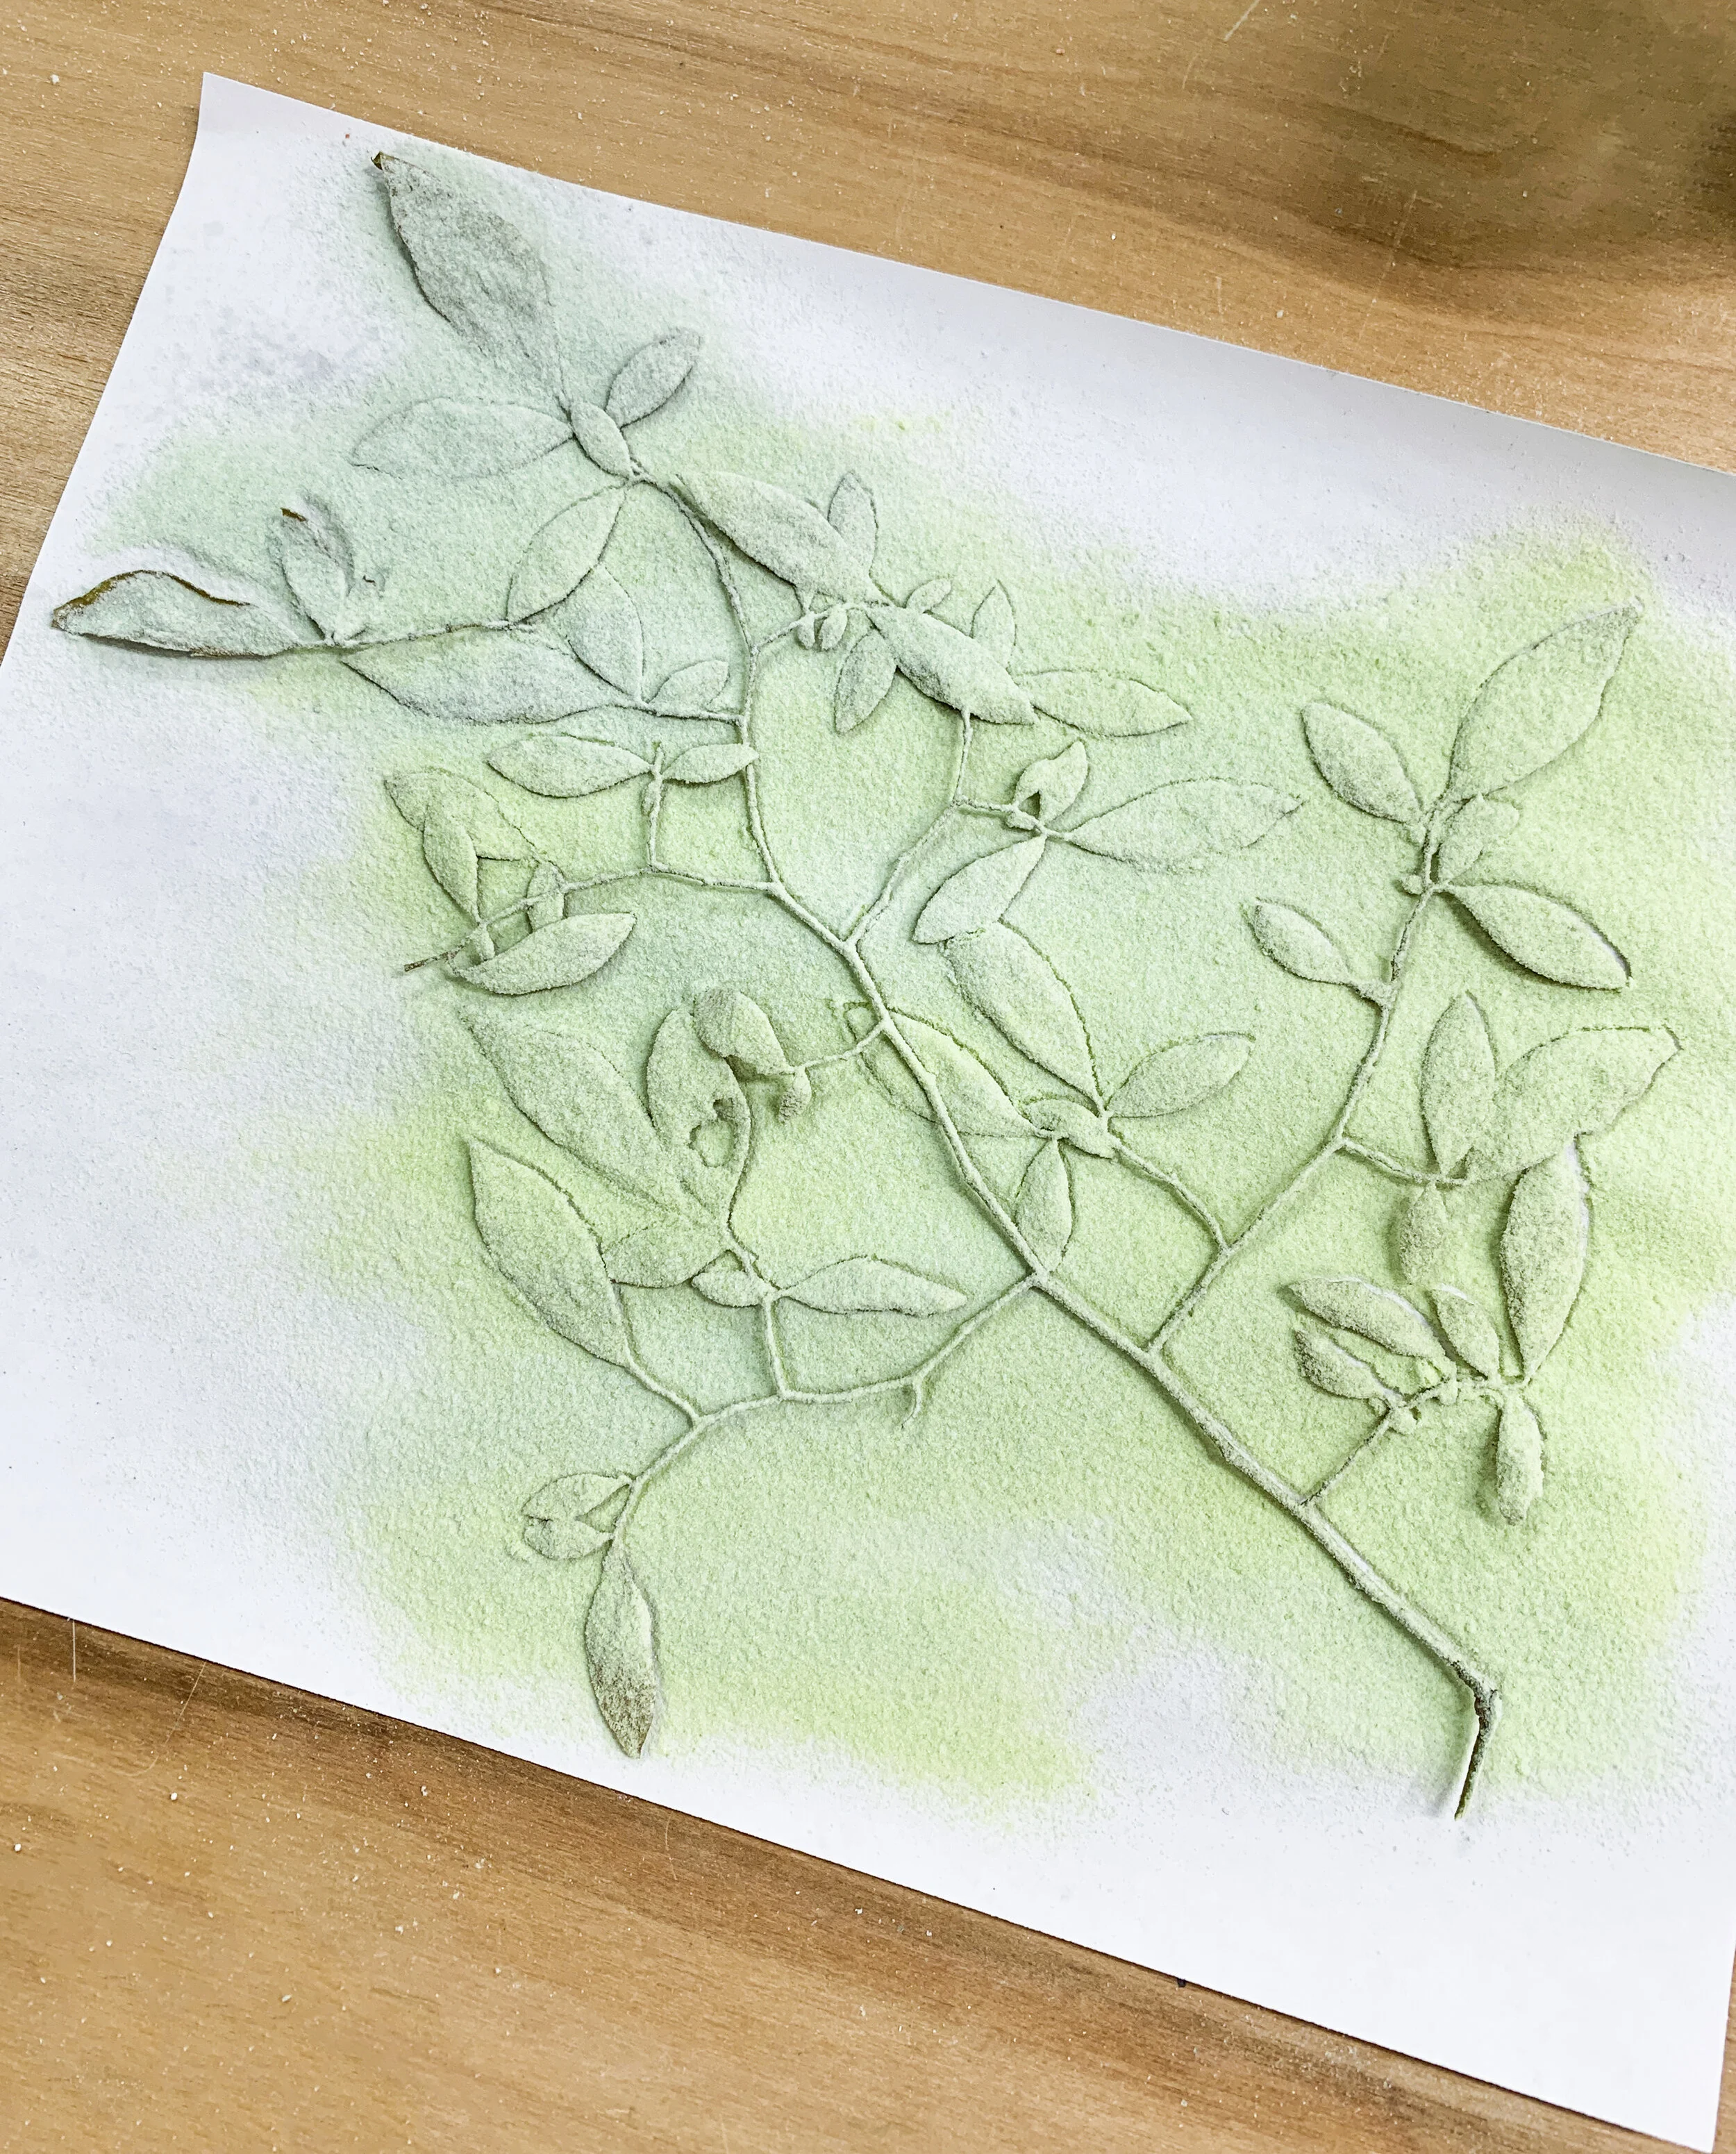
The next skill we learned in glass was with powders. The powders were finely ground up bits of glass that you could layer and apply to solid pieces. To get it to stick in place on the glass, I used aloe vera gel as a “glue.” The aloe melts away in the kiln and leaves the glass melted where you placed it.
I made a matching pair of giraffes – one in black & white (for me!) and another in orange & yellow for my friend Kaitlyn. I also tested the powders using REAL leaves, where they were coated and placed on glass. I gifted those final projects to friends for the holidays.

The next two projects were a total experiment. I took a ton of shards of scrap glass and layered them in a circle shape on top of each other. I made sure that each shape was touching another in at least one location. Then I fused that shape together.

After the melted glass came out I slumped it into a shallow bowl. Each one made such a beautiful unique shape. At first, I thought I’d like the clear one more, but as I’ve owned them, the metallic glass has become my favorite.

While some other projects were in the works, I made this popsicle piece! Again, I tried to utilize scrap glass to create different sweet treats. My favorites on here are the mint chocolate chip & the strawberry shortcake! I plan on putting this out in the summer.

This next project highlights the process of a making a pattern bar. You start with an empty metal container and fill it up with a bunch of glass. You can pick all different colors, but I stuck with what I knew. I used scrap clear and white glass to fill a long skinny cylinder. Once stacked, you stick it in the kiln and melt it together into one solid bar. Once cooled, you cut the glass with the wet saw into small little pieces.

The bar can be cut from its long or short side. I tried to utilize all the different types of cuts I could do from my one piece across several platters to use in my kitchen. It’s really neat to see similarities in the pattern car but differences.


Since the end of class fell near the holidays, I made a few things to decorate my house. To create this little melted snowman, I had to prep for a few weeks in advance. I melted tiny black squares & one orange triangle into little balls and shapes. Then I sketched out what the “body” of the snowman would be and cut the glass. His shape was then partially fused together at the end.

I also partially fused some ornaments for the tree! I smashed up glass and put it on triangle for interpretive trees and helped another girl make this little gnome!

The final week, I was running out of ideas. Another girl in glass had experimented with the ceramic paper and partially fused hearts, so I decided to test it for myself and take it a step further. I shattered a ton of glass and stuck it to the paper and placed little clear squares on top before putting it in the kiln.

I chose the colors to match those in my living room and kitchen. Once the little hearts were framed, I knew I had made a great decision with my final project!
I made more projects in this class than any other I had taken at the Visual Art Center. I felt like I had plenty of success and failures that each taught me a different part behind the glass fusing and slumping process. If you are interested at all in trying your hand at something new in 2020, I highly recommend this class.
